Back to Basics: Drawing and Anchoring

We’ve covered stance, posture, head position, hook, grip, and the bow arm. Finally, it’s the moment we’ve all been waiting for: drawing the bow! This is the step to which the vast majority of young archers rush (it’s understandable, it’s quite fun), but we have to remember that the key to archery is consistency, so creating a strong and repeatable shot is paramount to achieving accuracy. Drawing and anchoring are three important steps which, when executed consistently, set archers up for a very dependable shot. We’ll begin by covering the draw.
One key component to drawing a bow is what’s called the push-pull motion: reaching into the shot from the engaged latissimus dorsi muscles (lats) and drawing using the triceps and scapula.
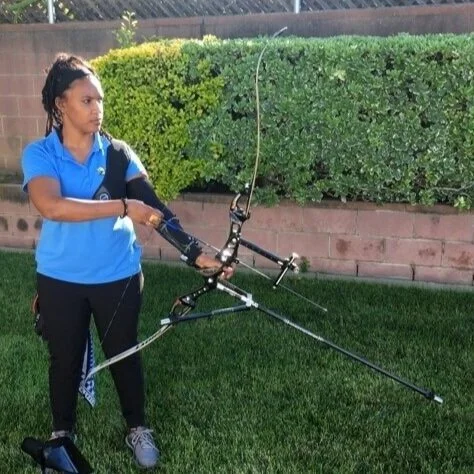


With the string properly hooked and the grip set, begin by engaging the lats which feels akin to trying to scratch one’s knee without bending (this feeling should be maintained throughout the remainder of the shot cycle).
Set the rear scapula by moving it toward the spine while keeping the rear shoulder down.
Raise the bow using the arms, not the shoulders. It helps to remember that the arms and shoulders are units that can move independently of one another. In other words, the arms hinge at the shoulders so that the shoulders remain low throughout the shot.
The hands (both bow and draw) should raise no higher than the cheeks so as to avoid sky drawing. By this point, the draw hand should be adjacent to the bow-shoulder.
As the archer reaches toward the target with the bow arm (the push), they should engage the triceps in the draw arm and use their pre-set scapula to bring the draw-side elbow around the body (the pull).
Bring the draw hand to the anchor point. By this step, the elbow should end up directly behind the archer. (The position of the anchor point is explained below).

As mentioned before, accuracy in archery is based in consistency; so, by default, a solid anchor is an archer’s best friend. The anchor is ideally established by aligning the index finger with the underside of the jaw bone so the knuckle of the thumb rests comfortably in the natural notch under the mandible (jawbone) found around an inch in front of the rear “angle” of the jawbone. Don’t forget to maintain head position as this will drastically affect the location anchor point.
To further ensure a consistent anchor, note that the string should touch two to three areas of the face: The nose, lips, and chin. Due to the fact that everyone’s anatomy is different and no two archers will have the exact same anchor, some archers forego contact with the nose, but the other two points should certainly be maintained!
The anchor should not move after this step until the follow-through! All other motion is done independently of the anchor from here on out.
There you have it, folks! For an even more in-depth description of the components of “Set Up,” check out Recurve Technique Guide - Setup by Online Archery Academy! If you have questions, please do not hesitate to email the OAS League Administrator at ahamilton@esdf.org for more information! Happy training!